


iDatalink Maestro HRN-AR-EXT4 4 Meter Extension Harness (HRNAREXT4)
iDatalink Maestro HRN-AR-EXT4 4 Meter Extension Harness
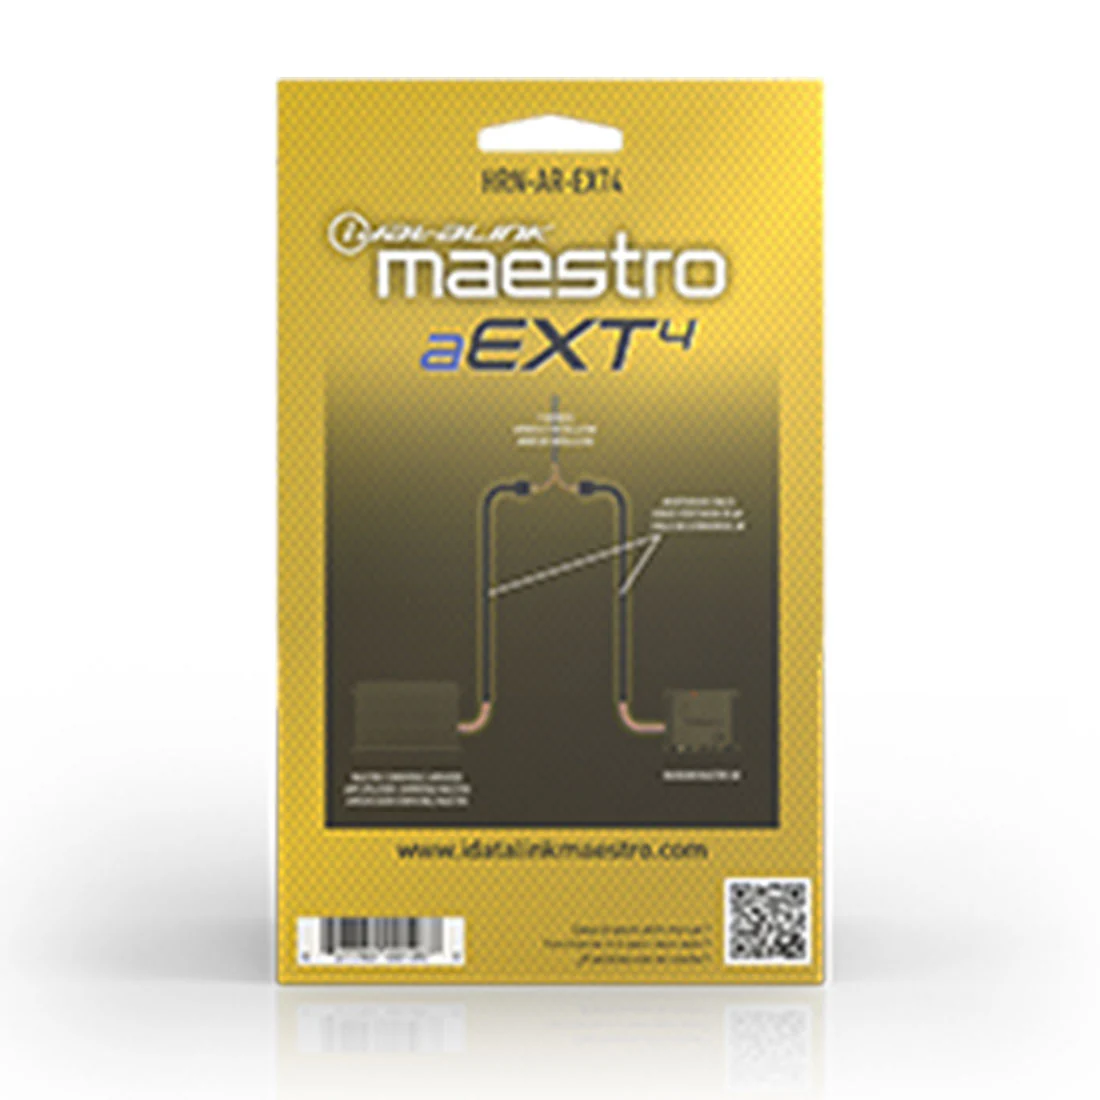
The HRN-AR-EXT4 is a 4-meter extension harness that allows the relocation of the Maestro amplifier replacement module and the new amplifier or DSP. This extension harness is ideal for situations where the factory-installed amplifier is located in a position without enough space for the new amplifier or DSP.
Features
The HRN-AR-EXT4 is designed with several features that make it a suitable extension harness for relocating the amplifier replacement module and the new amplifier or DSP. These features include: Length - The extension harness is 4-meters long, providing enough length to relocate the amplifier and DSP to a suitable location. Connectors - The HRN-AR-EXT4 comes with high-quality connectors that ensure a secure connection between the amplifier replacement module and the new amplifier or DSP. These connectors are designed to withstand vibrations, ensuring a stable connection. Compatibility - The extension harness is designed to work with several Maestro amplifier replacement modules, including the iDatalink Maestro AR and the Maestro AR Amplifier Replacement Module.
Installation
Installing the HRN-AR-EXT4 is a straightforward process that requires some basic knowledge of car audio installation. The installation process involves the following steps: Step 1: Disconnect the negative battery terminal. Step 2: Remove the factory-installed amplifier and the amplifier replacement module from the vehicle. Step 3: Connect the HRN-AR-EXT4 extension harness to the amplifier replacement module. Step 4: Route the extension harness to the new location of the amplifier or DSP. Step 5: Connect the extension harness to the new amplifier or DSP. Step 6: Reinstall the amplifier replacement module and the new amplifier or DSP. Step 7: Reconnect the negative battery terminal.
Compatibility


Original: $58.36
-70%$58.36
$17.51Product Information
Product Information
Shipping & Returns
Shipping & Returns
Description
iDatalink Maestro HRN-AR-EXT4 4 Meter Extension Harness
The HRN-AR-EXT4 is a 4-meter extension harness that allows the relocation of the Maestro amplifier replacement module and the new amplifier or DSP. This extension harness is ideal for situations where the factory-installed amplifier is located in a position without enough space for the new amplifier or DSP.
Features
The HRN-AR-EXT4 is designed with several features that make it a suitable extension harness for relocating the amplifier replacement module and the new amplifier or DSP. These features include: Length - The extension harness is 4-meters long, providing enough length to relocate the amplifier and DSP to a suitable location. Connectors - The HRN-AR-EXT4 comes with high-quality connectors that ensure a secure connection between the amplifier replacement module and the new amplifier or DSP. These connectors are designed to withstand vibrations, ensuring a stable connection. Compatibility - The extension harness is designed to work with several Maestro amplifier replacement modules, including the iDatalink Maestro AR and the Maestro AR Amplifier Replacement Module.
Installation
Installing the HRN-AR-EXT4 is a straightforward process that requires some basic knowledge of car audio installation. The installation process involves the following steps: Step 1: Disconnect the negative battery terminal. Step 2: Remove the factory-installed amplifier and the amplifier replacement module from the vehicle. Step 3: Connect the HRN-AR-EXT4 extension harness to the amplifier replacement module. Step 4: Route the extension harness to the new location of the amplifier or DSP. Step 5: Connect the extension harness to the new amplifier or DSP. Step 6: Reinstall the amplifier replacement module and the new amplifier or DSP. Step 7: Reconnect the negative battery terminal.
Compatibility